Table of Contents
Your website is like a house – it needs a clear address for visitors to find it. That’s where DNS records come in. They act like signposts on the internet, directing users to the right place. But what exactly are they, and how can you manage them effectively? This guide will unveil the world of DNS records and empower you to take control of your website’s traffic flow.
DNS: The Unsung Hero of Your Website
Imagine a visitor typing your website address into their browser. Behind the scenes, a complex dance unfolds. The DNS, or Domain Name System, acts like a phonebook for the internet. It translates your easy-to-remember domain name (like domain.com ) into a numerical IP address that computers understand. This IP address points to the physical location of your website’s files on a server.
When you integrate your webite with Ezoic via name servers or Cloudflare, Ezoic will act as a proxy between your own website and your website visitors. Because of this, it is very important that your DNS records here at Ezoic (Dashboard > Settings > DNS Settings) should bealways up to date and match exactly with the records you have over at your current hosting company.
There are different types of DNS records, each playing a specific role:
- A Records: These are the workhorses, directing visitors to the main server hosting your website.
- CNAME Records: Think of these as aliases. They point a subdomain (like [invalid URL removed]) to another website.
- MX Records: Crucial for email, these records tell the world where to deliver your website’s emails.
Keeping Your Website Running Smoothly: Why Updates Matter
DNS records are like traffic signs – they need to be accurate and up-to-date. If your records point to the wrong place, visitors might end up in a digital dead-end. Here’s where platforms like Ezoic come in.
Ezoic acts as an intermediary between your website and visitors, potentially optimizing content delivery and ad experiences. For this to work seamlessly, your DNS records in Ezoic’s dashboard need to mirror those set by your hosting provider.
How to Add and Edit DNS Records in Ezoic
Ezoic’s user-friendly interface makes managing DNS records a breeze. You can easily add new records, edit existing ones, or upload them in bulk using a CSV file. Here’s a quick walkthrough:
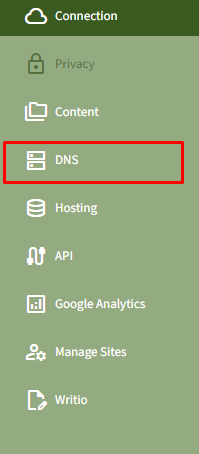
1. Log in to your Ezoic dashboard and navigate to “Settings” followed by “DNS.”


2. To add a new record, click “Add DNS Record” and fill in the details – record type, name, value (usually the IP address), and TTL (how long the record should be cached).

3. Editing existing records is just as simple. Click the pencil icon next to the record you want to modify, update the details, and save.

Expanding Your Digital Landscape: Adding Subdomains
Subdomains are prefixes you add before your main domain name, like “shop” in [invalid URL removed]. These can be created by adding a new DNS record with the desired subdomain name in the “Name” field.
Switching Homes: DNS Considerations When Changing Hosting Providers
Generally, switching hosting providers shouldn’t disrupt your website’s accessibility. Most providers allow you to use custom nameservers, meaning you can update the IP address in your DNS records to point to your new host. However, if you’re using Ezoic, remember to update the records in your Ezoic dashboard first, ensuring everything stays in sync.
Simplifying Integration: DNS with Cloudflare
If you’re using Cloudflare for additional website security or performance optimization, things get even easier. When integrated with Ezoic via Cloudflare, Ezoic acts as the main proxy. Any DNS updates you need to make should be done within the Ezoic dashboard first. These changes will then automatically propagate to Cloudflare, keeping everything streamlined.
Read More: How to integrate ezoic with cloudflare
By understanding DNS records and utilizing the tools provided by Ezoic, you can ensure your website remains accessible, efficient, and ready to welcome visitors with open arms (or pixels, in the digital world).


